The Challenger TFT kit contains all the building blocks you need to create beautiful display solutions with your Challenger MCU board.
The main attraction of the kit is the big 2,6″ LED backlit transmissive TFT display capable of producing 262 thousand colors in 480×320 pixels resolution. The display is easy to interface with any SPI bus interface and uses only 4 pins to connect.
The kit also comes with a Challenger TFT Wing board that connects the SPI bus to the display as well as all the required voltages and other control signals. It also has its own PWM controller on board for running the LED backligt LED’s in any intensity setting that you need.
The Challenger Wing works with all of our Challenger MCU boards and will most likely work with most other feather based boards from other manufacturers as well.
To run the display we’ve developed a driver for the Adafruit GFX system that works nicely with the display, allowing you to utilize all the features from the Adafruit driver system. The driver is currently only available from our gitlab but will be available directly from the Arduino library manager shortly.
Weight: 0.014 kg
Display details
| Feature | Specification |
| LCD type | 2.6 inch RGB |
| Resolution | 480×320 |
| Technology | a.Si TFT |
| Pixel configuration | RGB vertical stripe |
| Display mode | Transmissive / Normally black |
| Viewing direction | Straight / All o clock |
| Outline dimensions (W x H x T mm) | 59.6 x 47.3 x 2.2 |
| Active area (W x H mm) | 55.01 x 36.67 |
| Touch screen | No |
| Backlight type | White LED |
| Interface | 4 Wire SPI |
| Number of colors | 262.000 |
| Driver IC | R61531 |
Challenger Wing
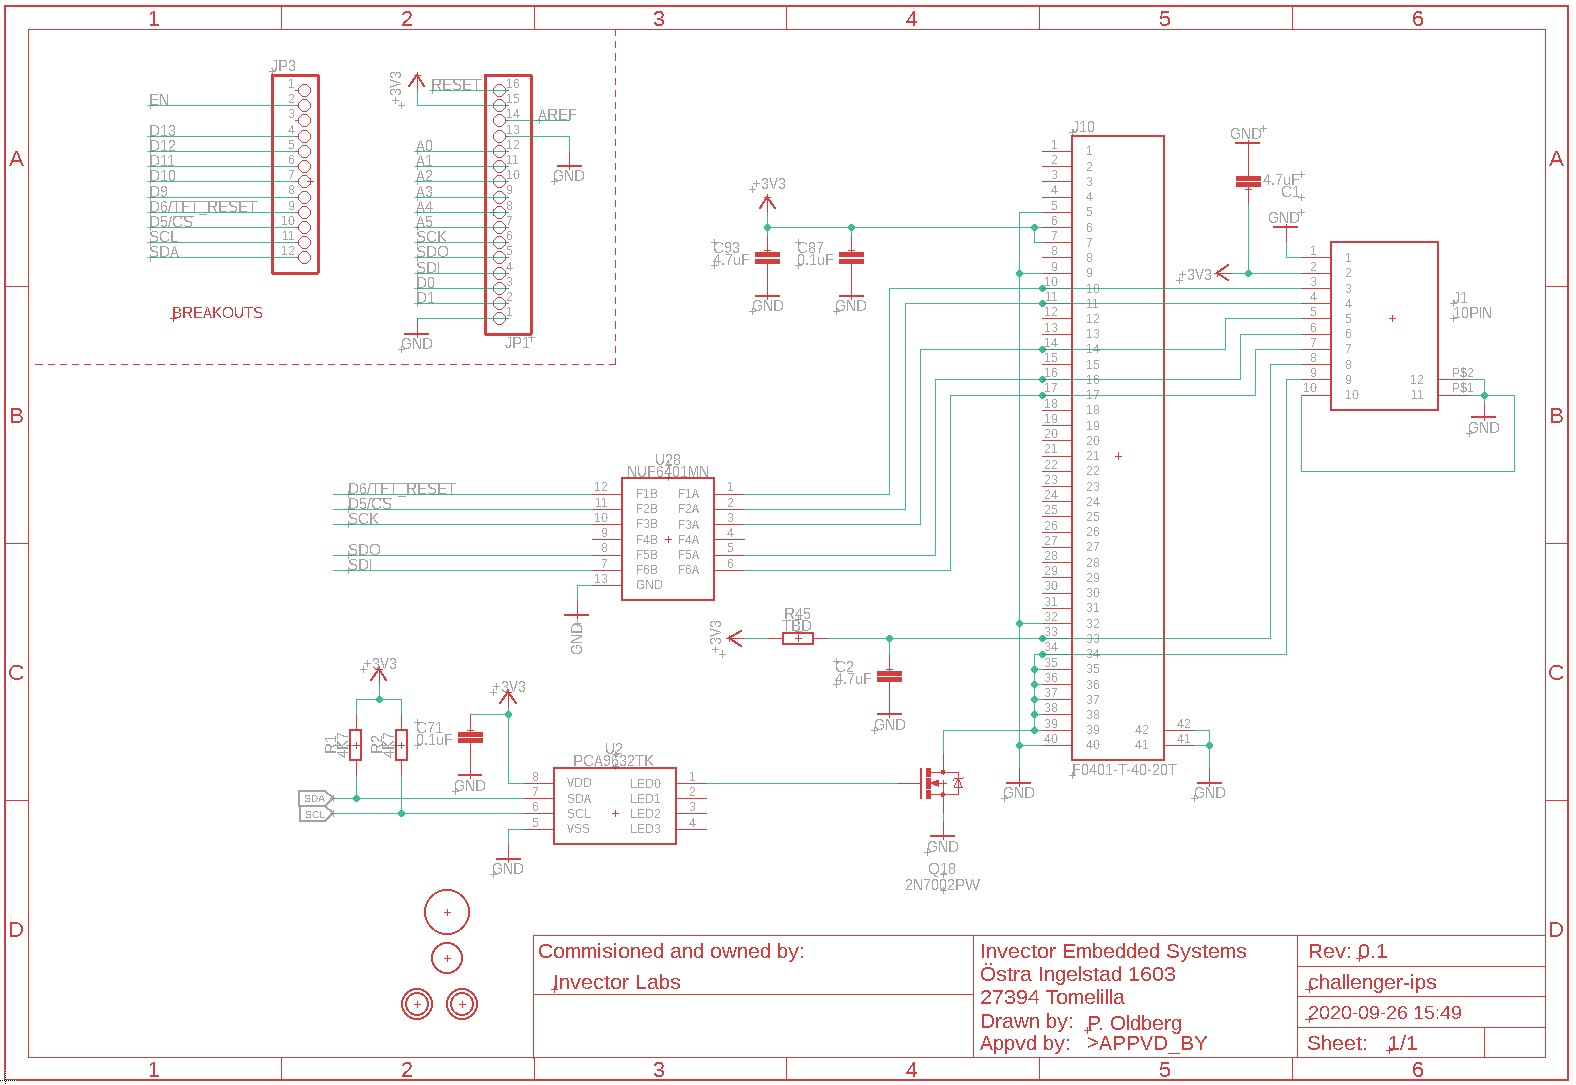
The Challenger TFT Wing acts as the interface between the Challenger MCU board and the display. Below is the schematic for the board that shows the different parts.

The SPI bus is fed from the board to board (btb) connector (JP1) through an EMI filter (U28) up to 2 different display connectors. The first display connector J10 is used to connect the display directly to the board. In this configuration the Challenger MCU board and the TFT Wing will sit together right behind the display. This is the easiest way to connect the different parts together. Used together with double sided foam tape compact systems can be built using these components.
The second display connector (J1) is used together with a FFC (Flat Flex Cable) to connect the display which allows you to have the MCU board located away from the display. You can read more about this solution here.
At the bottom of the schematic you can see the PWM controller that controls the LED backlight. This will allow you to set the backlight to any desired intensity for you application.
Resources
| Weight | 0.014 kg |
|---|


